As far as the Cold War stuff goes, I've been working on both sides simultaneously; for the BAOR, I've been working on a Battlegroup Command base, for higher level games. The figures are from the ever dependable hand of Matt at Elhiem, with some subtle tweeking by yours truly (since my fictional Cold War is viewed by the rose-tinted goggles of the ARRSE forum...)
The Base consists of the CO, in obligatory Barbour jacket. No one tells the CO he's improperly dressed, though the RSM may gently hint at it... he's acompanied by the Ops Officer; no idea if this is the correct 1980s terminology, but he's represented here in all his Silvermans Trolley Dash glory- SAS Smock, Tropical Comabat Trousers and DILAC hat. Well ally. Also present is the Adjutant, wielding a map and compass (the most terrifying sight in NATO), an officer from the RAC element of the Battlegroup and the RSM, pointing out to the ruperts that Ivan is in fact that way, oh yes, and Pvt MacAuslan is on jankers again, for pissing in the stew.
The plan is to have them clustered around a table strewn with maps, Thermos flasks and fags...
Left to right- Ops Officer, RAC Officer, CO, Adjutant, RSM.
On the other side of the IGB, I finally managed to get the four
remaining figures in the first Russian platoon finished. I never
intended to do two platoons, but Elhiem released a flurry of new Soviet
Riflemen poses, and I simply must posess all the pretty things...
Hope to get the BAOR base finished for the end of the month...
Cheers
Iain
The Roaring Northerners are Dave Stewart, John Hill and Iain Robertson; a loose affiliation of tabletop wargamers and figure painters who inhabit the frozen and somewhat soggy wastelands of west central Scotland. Shadowy and secretive, they stoically quest to reduce the scale of the lead mountain that threatens to engulf them all, and perhaps even find the time for the occasional game...
....This is their story
Showing posts with label 20mm. Show all posts
Friday, 4 March 2016
Thursday, 3 March 2016
Belated Updates! No.2- A Game of Black Ops
Having struggled to get our heads round the Force on Force ruleset from Osprey, we've been on the look out for something that could provide a workable alternative to allow us to actually get some figures on the table and rolling dice (I really want to like the FoF rules, they do seem to be a decent set, but just really poorly laid out out and confusing at first, without someone who knows what they're doing to actually teach you the game...). I'm looking forward to the future release of the Battlegroup expansion for Cold War, but that's a) years away and b) pitched at larger scale engagements than the usual platoon level skirmishes we usually play. Assuch, when I saw the release of the Black Ops set from Osprey, I was intrigued. Could this be something we could use?
While it seemed to be pitched more at sneaky-beaky style asymmetric engagements rather than conventional battle, it might at least provide us with something that in true Roaring Northerners fashion we could bastardise into suiting our purposes...
So, having picked up a copy and had a look through, it seemed that we could tweak it for some conventional shenannigans on the Central Front. Designed, as they are, for small unit, covert action in the modern period, a certain amount of "clunkiness" was expected, as we would be doing a 1980s Cold War setup, involving conventional forces, on a rather sparsely populated board....
However, it all went rather well, actually. We decided on a variation of the "Assault" scenario. Rather than two reconnaisance forces having a meeting engagement, it was arranged that a small force of Dave's Czechs, composed of 4 fireteams mounted in two BMP-1s, supported by a BRDM-2 and a PKM team were attempting to punch through a covering screen of my BAOR, fighting a delaying action. BAOR forces consisted of a two fire teams, a MILAN team and a SF GPMG, all in pre-prepared positions. This worked out with the Czechs having about 150% of the points available to BAOR, which was what was suggested in the rules. 7 turns were allowed for the Czechs to either force their way of the opposite table edge, or drive the BAOR off same, and continue their advance towards the Channel.
It started well for the Czechs, although the BRDM stopped a MILAN missile early on and was immobilised half way across the board. Both BMPs charged past it and were rapidly bearing down on the BAOR positions when both were stopped; one falling victim to a MILAN missile, the other took a sustained burst of GPMG fire in the side armour. This caused both to burst into flame and subsequently explode, taking almost all of the crew and infantry dismounts with them. The remaining Czechs then came under sustained small arms fire, and despite some excellent suppression early on of the MILAN team (which had allowed the BMPs to get as close as they did), were slowly shot to pieces, and forced to withdraw by turn 4. The BAOR also suffered casulaties, but definitely benefitted from being in prepared posistions.
All in all, a very enjoyable game. A believable result was achieved by the use of realistic forces and tactics used by both sides, and had the Czechs perhaps had one more BMP and section, or even been luckier in saving more of those riding in the existing BMPs, the result could have been very different.
I was pleasantly suprised by just how well these rules translated into conventional warfare, from the more "stealthy" verison they are invisioned for. Definitely need to get my SAS painted up and get them sneaking about a Soviet supply depot I think!
Since this was a "first run through" I didn't bother taking proper chronological photos, rather just some snaps as we went along for the sake of recording the madness...
Definitely a game we will need to get back to, with more terrain. John has also caught the bug now and obtained not only the rules but several factions (which the bugger has already pinted too!) So inaddition to my Soviets and Brits, and Dave's Czechs, we now have Chechens, Mercenaries, terrorists and more Brits...
Cheers
Iain
While it seemed to be pitched more at sneaky-beaky style asymmetric engagements rather than conventional battle, it might at least provide us with something that in true Roaring Northerners fashion we could bastardise into suiting our purposes...
So, having picked up a copy and had a look through, it seemed that we could tweak it for some conventional shenannigans on the Central Front. Designed, as they are, for small unit, covert action in the modern period, a certain amount of "clunkiness" was expected, as we would be doing a 1980s Cold War setup, involving conventional forces, on a rather sparsely populated board....
However, it all went rather well, actually. We decided on a variation of the "Assault" scenario. Rather than two reconnaisance forces having a meeting engagement, it was arranged that a small force of Dave's Czechs, composed of 4 fireteams mounted in two BMP-1s, supported by a BRDM-2 and a PKM team were attempting to punch through a covering screen of my BAOR, fighting a delaying action. BAOR forces consisted of a two fire teams, a MILAN team and a SF GPMG, all in pre-prepared positions. This worked out with the Czechs having about 150% of the points available to BAOR, which was what was suggested in the rules. 7 turns were allowed for the Czechs to either force their way of the opposite table edge, or drive the BAOR off same, and continue their advance towards the Channel.
It started well for the Czechs, although the BRDM stopped a MILAN missile early on and was immobilised half way across the board. Both BMPs charged past it and were rapidly bearing down on the BAOR positions when both were stopped; one falling victim to a MILAN missile, the other took a sustained burst of GPMG fire in the side armour. This caused both to burst into flame and subsequently explode, taking almost all of the crew and infantry dismounts with them. The remaining Czechs then came under sustained small arms fire, and despite some excellent suppression early on of the MILAN team (which had allowed the BMPs to get as close as they did), were slowly shot to pieces, and forced to withdraw by turn 4. The BAOR also suffered casulaties, but definitely benefitted from being in prepared posistions.
All in all, a very enjoyable game. A believable result was achieved by the use of realistic forces and tactics used by both sides, and had the Czechs perhaps had one more BMP and section, or even been luckier in saving more of those riding in the existing BMPs, the result could have been very different.
I was pleasantly suprised by just how well these rules translated into conventional warfare, from the more "stealthy" verison they are invisioned for. Definitely need to get my SAS painted up and get them sneaking about a Soviet supply depot I think!
Since this was a "first run through" I didn't bother taking proper chronological photos, rather just some snaps as we went along for the sake of recording the madness...
Definitely a game we will need to get back to, with more terrain. John has also caught the bug now and obtained not only the rules but several factions (which the bugger has already pinted too!) So inaddition to my Soviets and Brits, and Dave's Czechs, we now have Chechens, Mercenaries, terrorists and more Brits...
Cheers
Iain
Saturday, 24 October 2015
STARLIGHT! BAOR Saracen and land Rover 101FC Ambulances
Finally got the medical elements for my BAOR force finished, ready for the deadline of The Guild's "Ambulance" Group build.
Both are old JB Models pieces, with the Saracen being converted from the APC version. I'm quite pleased with how these have come out, though I am now more convinced than ever that decals are the work of the Devil...
I should be getting on with S&S Models lovely re-mastered CET, but after last week's Lion Rampant game, I can feel myself getting drawn back towards mediaevals again...
Cheers
Iain
Both are old JB Models pieces, with the Saracen being converted from the APC version. I'm quite pleased with how these have come out, though I am now more convinced than ever that decals are the work of the Devil...
I should be getting on with S&S Models lovely re-mastered CET, but after last week's Lion Rampant game, I can feel myself getting drawn back towards mediaevals again...
Cheers
Iain
Labels:
1/72,
20mm,
Ambulance,
Ambush Alley,
BAOR,
British,
Cold War,
Cold War gone Hot,
Force on Force,
Land Rover,
medical,
Saracen,
Support
Monday, 18 May 2015
Flame out, prepare to eject!
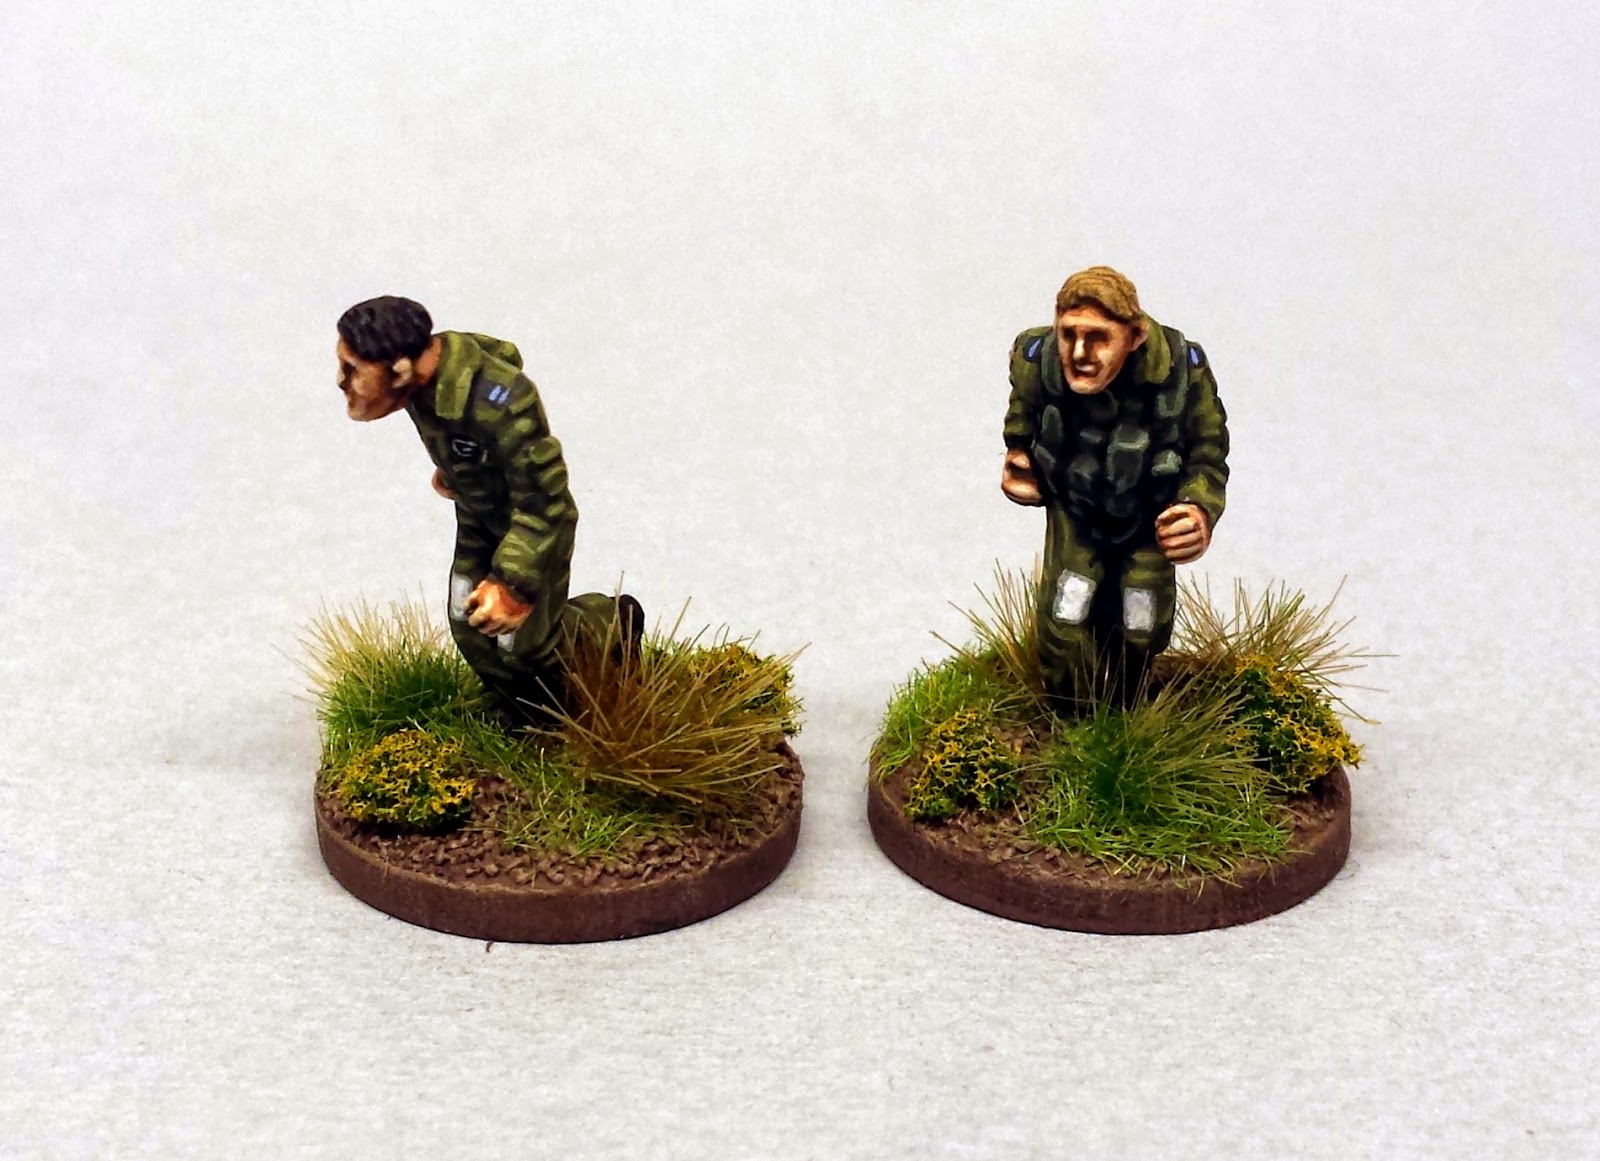
In the search for something meaningful to base a scenario round for Force on Force, I've been working on various waifs 'n' strays for the cold war. First on the list, a couple of RAF aircrew, who are most assuredly not having a good day.
Figures are modern Elhiem, painted up to give the impression of 1980s RAF Germany types (not strictly accurate, but good enough for 3-foot distant).
I can forsee some sort of scenario, whereby the pilots start the game in the middle of the table (possibly moving about randomly with the aid of a scatter dice, until they enter optimum range of either side), with a NATO rescue party closing in from one side and a Soviet sweeper team from the other, with the objective of carting the luckless aviators back to their respective table edges (with the neccessary dependents penalties being enforced on whatever unit currently has custody of the fliers).
It does, however, still remain for us to get a sufficient handle on the rules to allow basic gameplay, before we get totally carried away with ourselfves...
Cheers
Iain
Figures are modern Elhiem, painted up to give the impression of 1980s RAF Germany types (not strictly accurate, but good enough for 3-foot distant).
I can forsee some sort of scenario, whereby the pilots start the game in the middle of the table (possibly moving about randomly with the aid of a scatter dice, until they enter optimum range of either side), with a NATO rescue party closing in from one side and a Soviet sweeper team from the other, with the objective of carting the luckless aviators back to their respective table edges (with the neccessary dependents penalties being enforced on whatever unit currently has custody of the fliers).
It does, however, still remain for us to get a sufficient handle on the rules to allow basic gameplay, before we get totally carried away with ourselfves...
Cheers
Iain
Labels:
1/72,
20mm,
Ambush Alley,
British,
Cold War,
Elhiem Figures,
Force on Force,
objective,
RAF
Battle Report- NATO Central Front, Northern Germany, 1986
A rather belated update of a game from a few(!) weeks ago, Force on Force Cold War...
After a dismal first showing several months ago (admittedly
with only one BAOR section each), Dave and I decided to have another bash at the
Force on Force Cold War rules up at the East Kilbride Warlords club, this time
with a proper force on each side. I had command of the stalwart BAOR on the
defensive, while Dave held the reins of the WarPac juggernaut, in the shape of
his Czechoslovak Motor Rifles.
What followed was a far more entertaining game than last time round (still interrupted with copious amounts of book-checking and sucking of teeth and muttering, but definitely less than last time!). We probably skipped over more rules and game mechanics than we intended, and over simplified much, but this time it definitely seemed to flow better, even if we did do a lot in the wrong order and forget to do half of the things we should have done. Who knows, maybe at some point we’ll get a proper game in, and actually use all the bells and whistles properly?! (Who are we kidding…)
Anyway, on with the pictures of shiny toys. Transport yourself to northern Germany, it’s 1986, Active Edge has been called and the balloon is well and truly skybound at a fearsome rate of knots. We join the Queen’s Own Atholl Rangers on the Forward Edge of Battle, anxiously awaiting what is about to tear out from the eastern forests…
What followed was a far more entertaining game than last time round (still interrupted with copious amounts of book-checking and sucking of teeth and muttering, but definitely less than last time!). We probably skipped over more rules and game mechanics than we intended, and over simplified much, but this time it definitely seemed to flow better, even if we did do a lot in the wrong order and forget to do half of the things we should have done. Who knows, maybe at some point we’ll get a proper game in, and actually use all the bells and whistles properly?! (Who are we kidding…)
Anyway, on with the pictures of shiny toys. Transport yourself to northern Germany, it’s 1986, Active Edge has been called and the balloon is well and truly skybound at a fearsome rate of knots. We join the Queen’s Own Atholl Rangers on the Forward Edge of Battle, anxiously awaiting what is about to tear out from the eastern forests…
Central to the Czech armoured onslaught was Dave’s newly
painted T-72, which promptly drew all sorts of MILAN and Charlie G fire, and
thus quickly succumbed to the first rule of miniature wargaming…
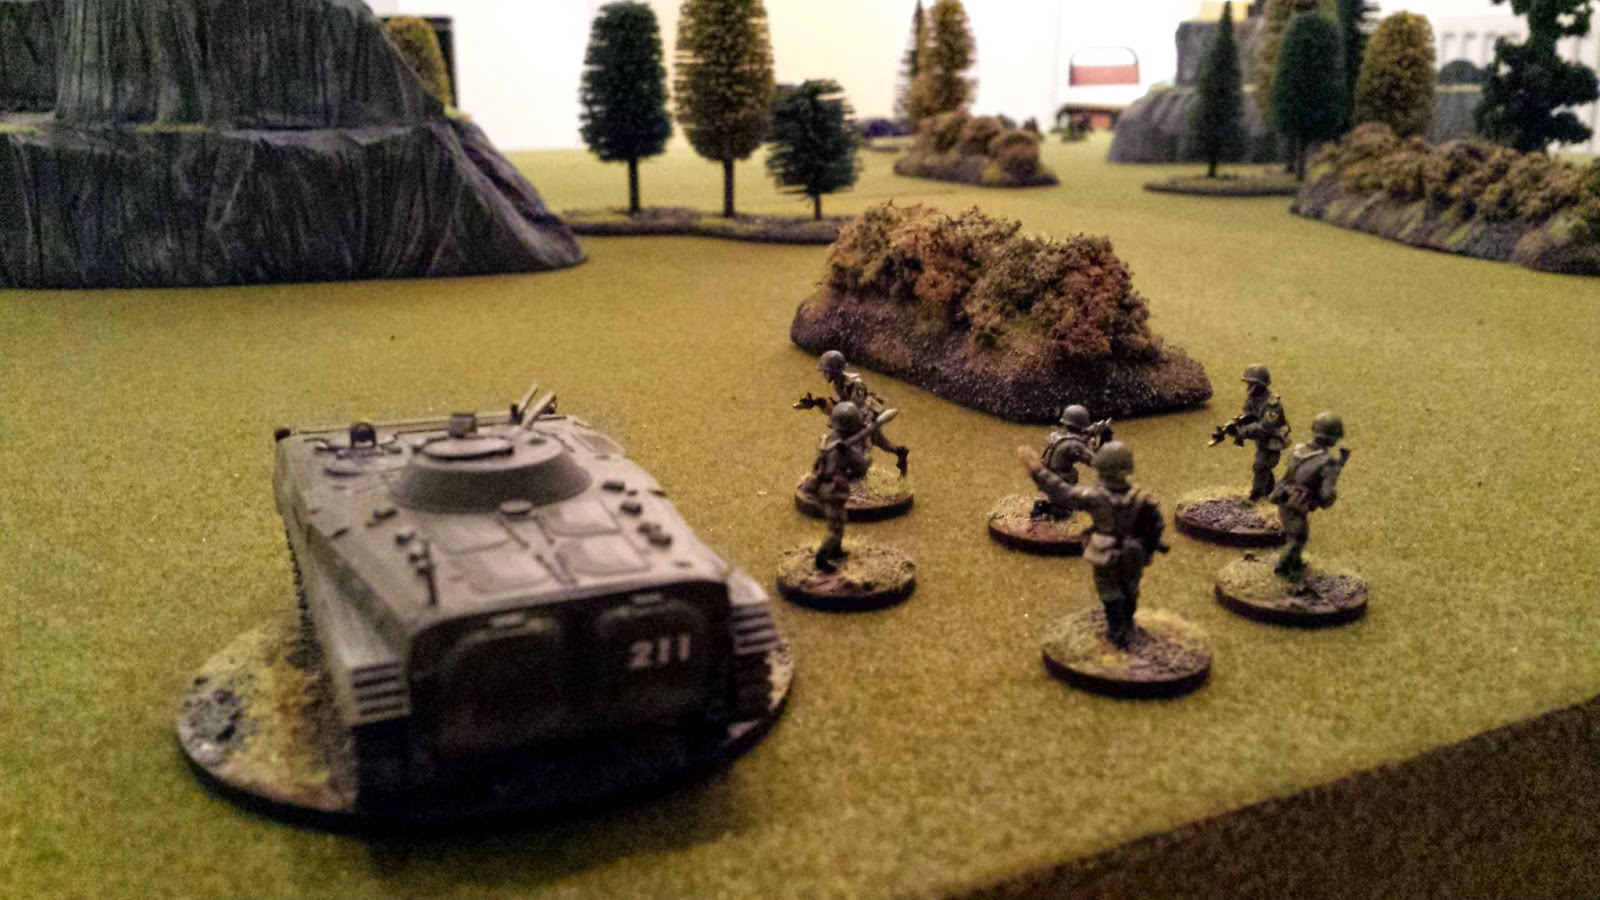
Callsign 211, apparently in some confusion as to what way
they should be facing…
A Section move forward, covered by some Yeomanry types…
… while B Section and a MILAN team anchor the opposite
flank
A Blowpipe team pressed into service in the surface to surface role. We counted it as a Charlie G, similarly, Dave’s lone SA-7 operator became an RPG-7.
Plan A did not end well for the Yeomanry…
The T-72 proves rather more effective as cover than it did
as an unstoppable dealer of high-explosive death…
…while Callsign 213 manoeuvre through the woods
And then there were 3…
Platoon HQ, not doing a great deal.
Tank action!
Peekaboo!
As for the result, after a hard fought slog, the BAOR managed to grind the WarPac advance to a standstill mid-table, buying time for a NATO regroup further west, and allowing the orderly withdrawal of forward elements. Or something like that.
Cheers
Iain
Subscribe to:
Posts (Atom)